This space is being written at the moment, so information might seem incomplete. Come back later, or watch this space so you can receive update notifications when new stuff is being written.
Using the Hyper-V Virtual Machine
To Run
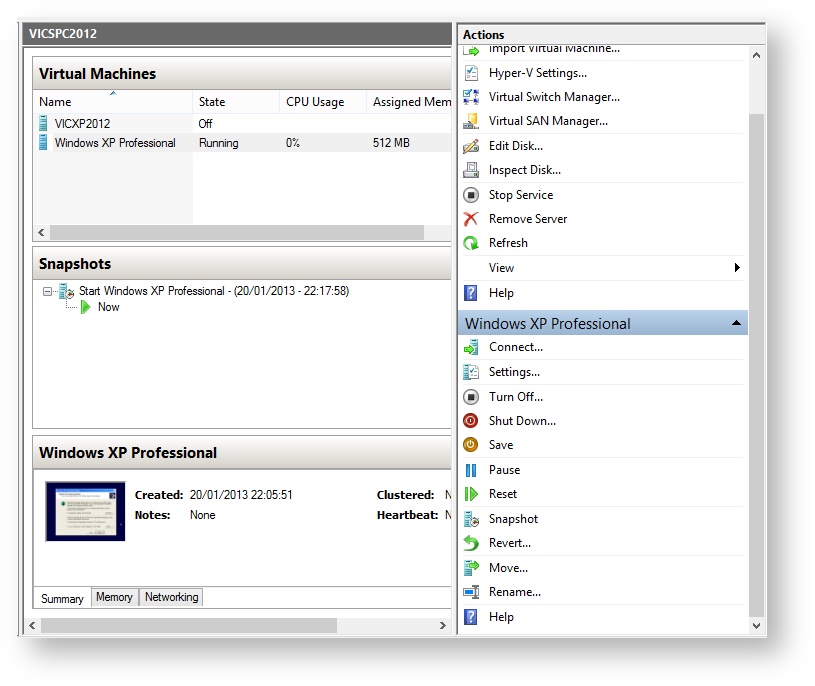
Open the Hyper-V Manager.
Check that the Virtual Machine is selected (Windows XP Professional), then select Connect.
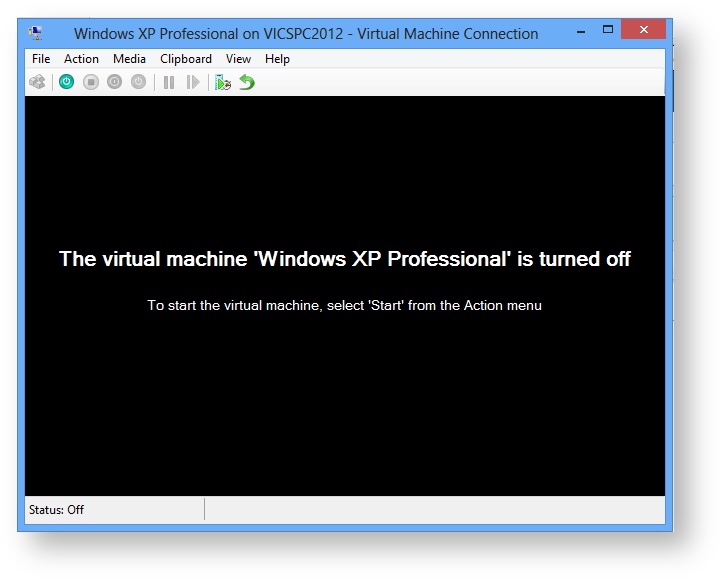
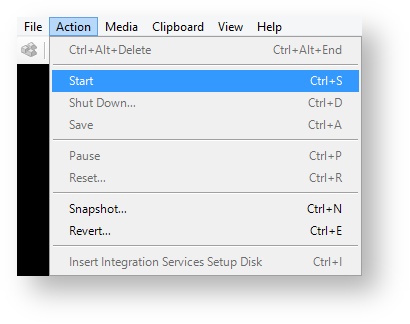
The VM will open with the instructions to start,
Using the Mouse
When the mouse is in the VM's window, a message is displayed. To move the mouse out of the Window,
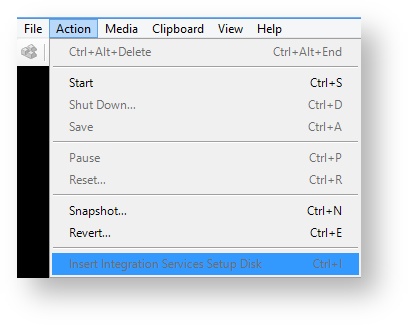
Insert Integration Services Setup Disk
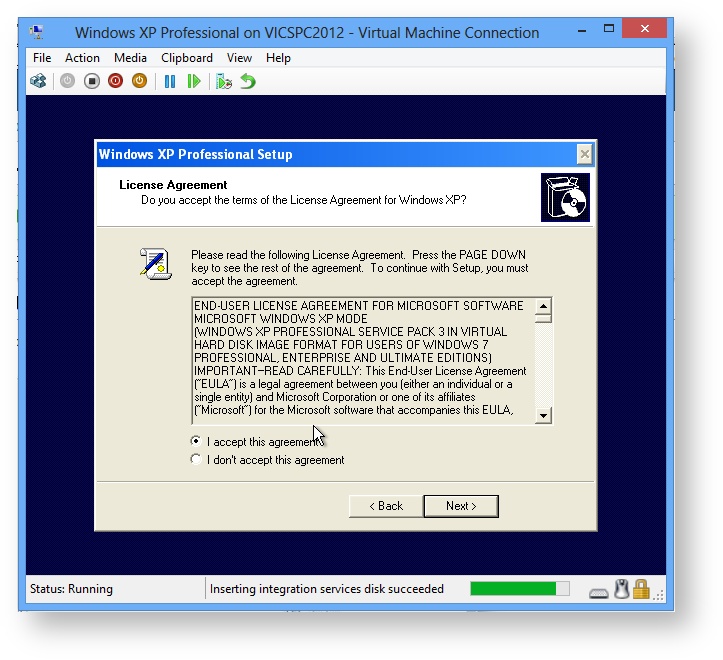
Whilst it is running select Ctrl+I This loads a software CD disk to Drive D: Its progress is shown on the bottom bar.
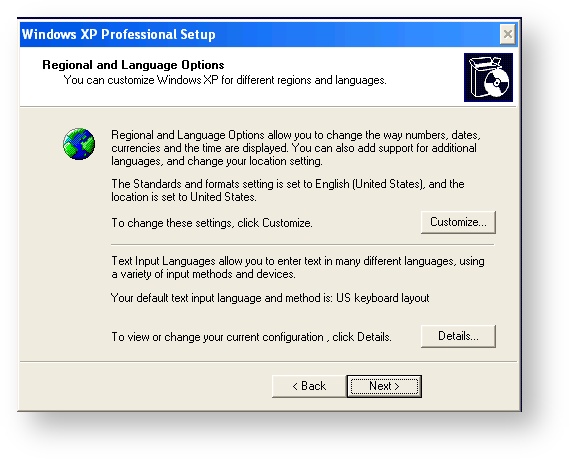
Windows xp Professional Setup
The setup procedure follows, just as a reminder for a United Kingdom installation.
Regional and Language Options
Regional Options
Change:
Standards and formats- English (United Kingdom)
Location - English (United Kingdom)
Text Input Languages
Remove US Keyboard
Computer Name and Administrator Password
You choose: Remember about the Computer name (or it will). Letters (A-Z), numbers (0-9), and hyphens, but no spaces or periods (.). The name may not consist entirely of digits.
Date and Time Settings
The date and time will be correct as they are taken from the host.
Time Zone (GMT) Greenwich Mean Time : Dublin, Edinburgh, Lisbon, London
Automatically adjust clock for daylight saving changes - ticked.
Disk gets changed to NTFS
Don't panic, it just worked . . .
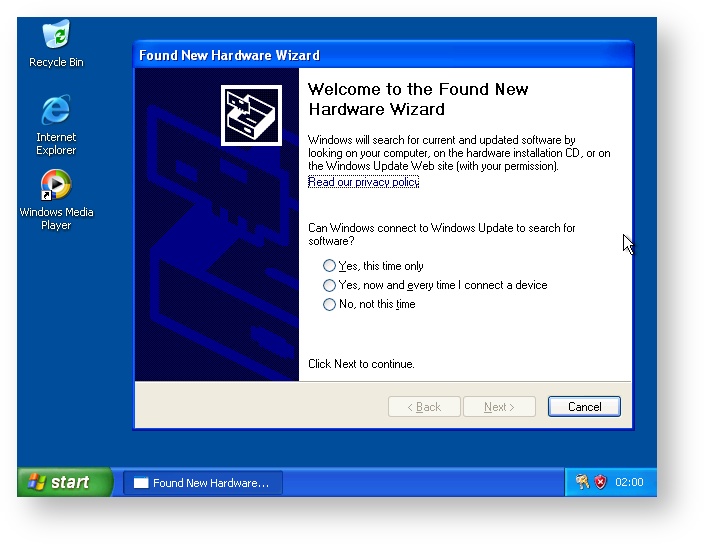
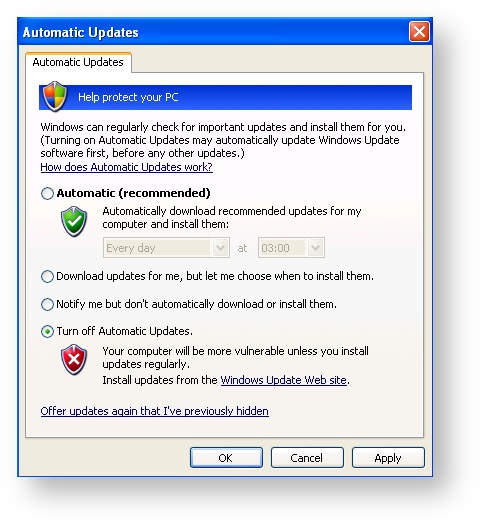
Found New Hardware and Automatic Updates
There are two sorts of these 'Found New Hardware' messages, one that asks to access the internet and the other one asks for drivers. Whenever they appear, Cancel it. This Hardware Wizard does not have the correct spell to do these operations at this point of the installation. The internet is not connected yet - Cancel Turn off Automatic Updates as well.
Virtual Machine Guest Installer
Run the Integration Services Setup Disk to install additional software and drivers for the Operating System so that it interfaces with the Server correctly.
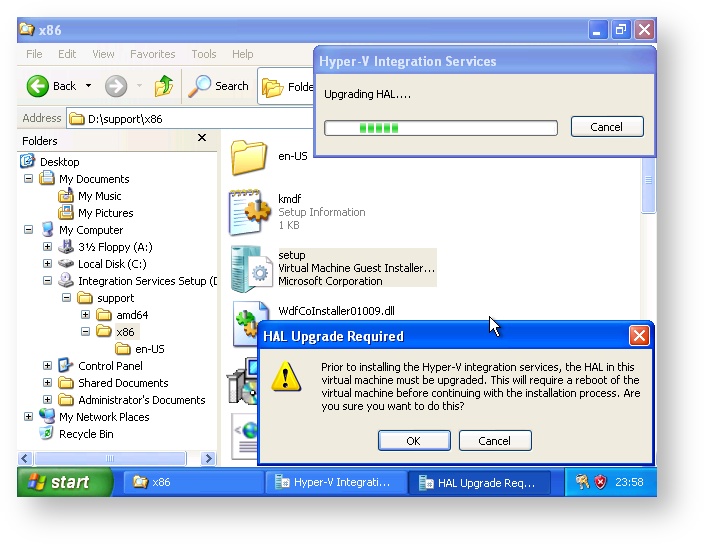
Use Windows Explorer, Select D:\support\x86 (or amd64)
Run setup
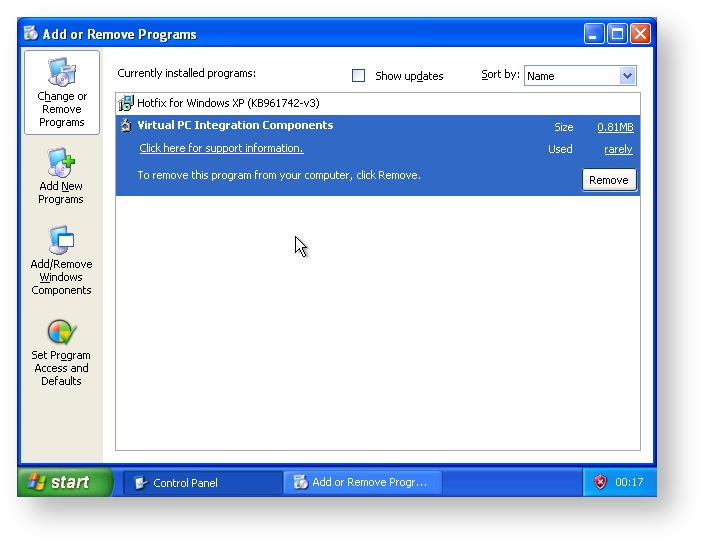
Virtual Machine Additions Detected - Uninstall Virtual PC Integration Components
If the following screen is displayed, the Virtual PC Integration Components has been installed. Uninstall it by using the Control Panel - Add or Remove Programs and then reboot.
ELSE the previous section gets skipped.
HAL upgrade
The HAL is upgraded and a reboot is required.
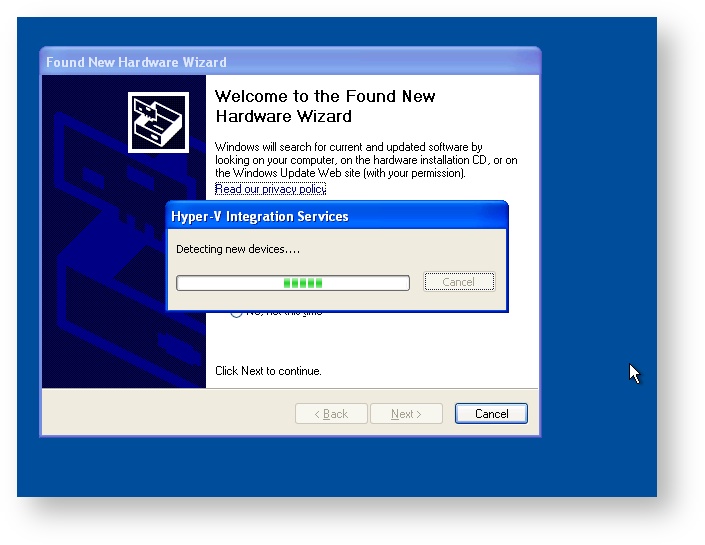
upon rebooting, the Hardware Wizard completes his magic with the new spellbook.
Check Hardware Network & Internet
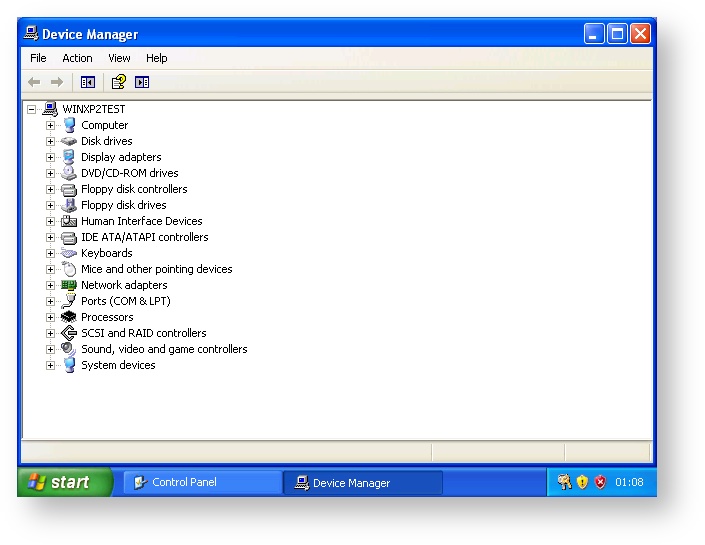
Select Control Panel / System / Hardware / Device Manager /
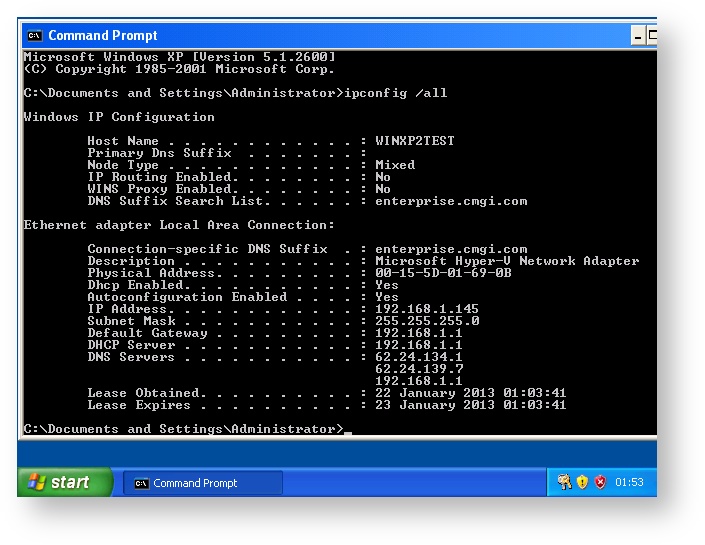
Check to see there are no yellow warning symbols. Select Accessories / Command Prompt
Use the command
ipconfig /all
If the screen looks similar to the one above, the Internet connection is enabled.
Screen Resolution
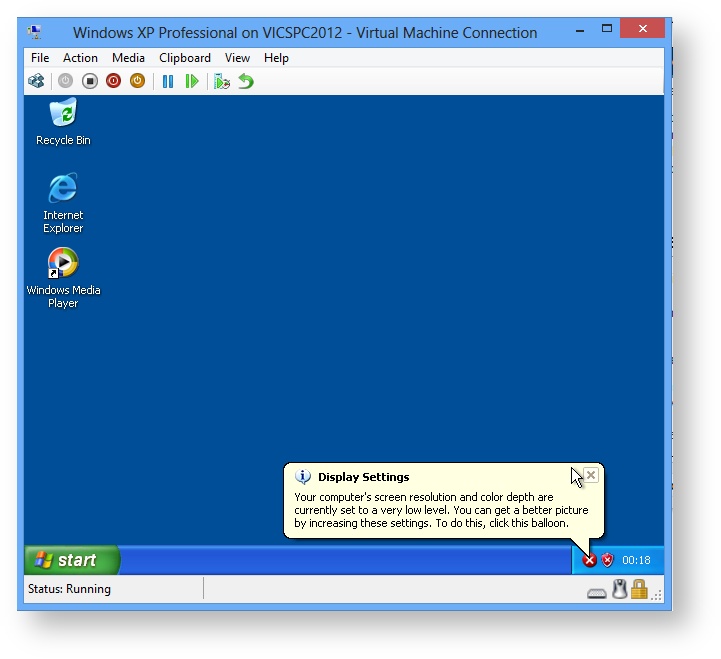
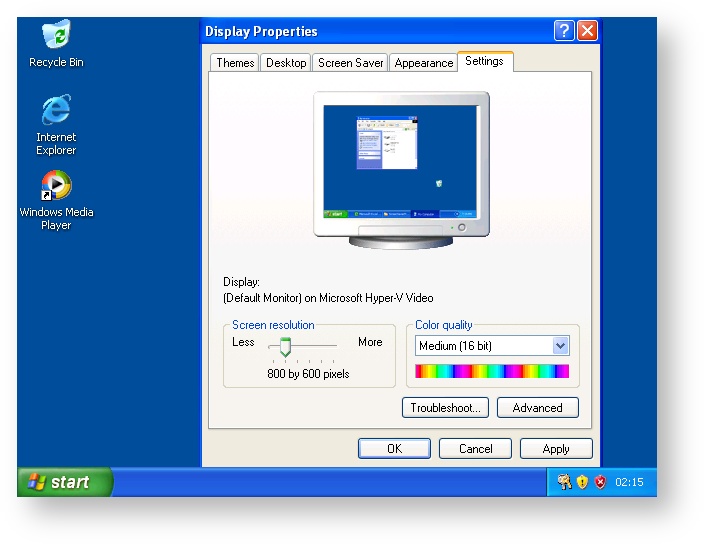
If there is an icon that invites the screen size to be increased. Select it and change it to a larger size. 800 x 600.
If the icon has disappeared, the screen properties may be changed by right clicking the mouse on the screen, select Properties / Settings /. The screen resolution can then be changed.
External Links
run %systemroot%\system32\msoobe.exe /a
http://support.microsoft.com/kb/307890/en-us
Working Area
In this manual, anything displayed on the Cambridge Z88 screen is shown in a computer typeface, such as
Name of file to save
Anything that you should type at the keyboard is shown in a different typeface to designate the keyboard keys; for example
You are invited to a party
The keys on the keyboard with a special function are shown in the text with key legends. So, for example, if you are asked to type
myfile
you would actually type the letters m y f i l e and then press the
In general, references to menu headings are in bold caps; for example LAYOUT.
References to individual commands are in bold; for example Save or Load.
References to options displayed by a command are in italics; for example Save only range of columns.
The 'Square' key is represented using the symbol, also identified as the
The 'Diamond' key is represented using the symbol, also identified as the
The cursor keys are represented as , , and key on normal PC.



0 Comments