Creating Eazylink/Flashstore
There are two ways to upgrade your Flashcard
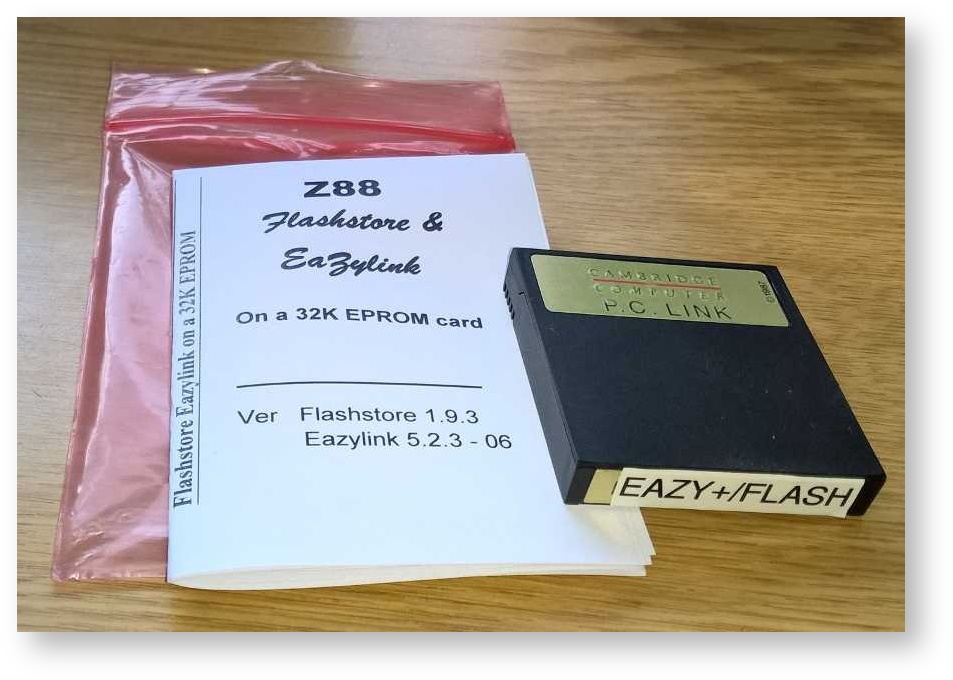
- Get in touch with Rakewell who offer the service of
upgrading (your own EPROM) or
supplying EPROMs with Eazylink & Flashstore. - Do it yourself
See Prerequisites
Prerequisites
INFO Put the EPROM in the EPROM ERASER NOW
If you are going to blow the image into an EPROM card, start erasing it now, as it may take several attempts to erase it completely.
- Desktop Installation
- Connect the Z88 to the Desktop
- Extra RAM fitted in slot 1. Large enough to receive and store all the files required.
- EPROM or Flash card to store the image (as a separate operation)
The Z88 needs to have the following cards as a minimum configuration.
- Slot 1 needs to have at least 128K
- Slot 3 has a blank 32K EPROM card to blow the two applications.
The alternative temporary solution is to use the Flash card that OZ will be loaded into. The Z88's configuration is either the 512K/512 RAM/Flash option:-
- Slot 1 has 512K to saves the files into
- Slot 1 also has 512K Flash card to blow the two applications into.
or the 512K RAM (minimum)/1M Flash option:-
- Slot 1 has 512K to saves the files into
- Slot 2 is a 1M Flash card to blow the two applications into.
Downloading Files
Download from the Wiki the files needed to transfer to the Z88. If they are zipped, unzip all the files on the Desktop Computer and save them all in a separate directory.
| Download Location | ||
|---|---|---|
| Eazylink | FlashStore | |
| Eazylink 5.2.3-06 | Flashstore 1.9.3 | |
| Files Required | eazyLink.63 | flashstore.63 |
| Imp/Export | 4 minutes 10 seconds | |
For convenience This section has been copied from the Eazylink2 User Guide to show how to do this.
On the Desktop start Eazylink2.
First time use
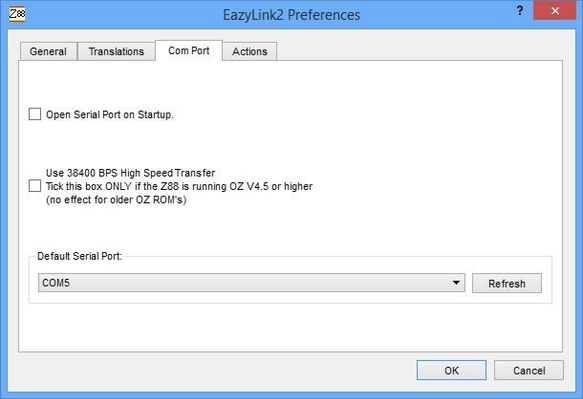
The first time Eazylink is connected to the Z88 the Com Port window is displayed.
- Clear the 'Open Serial Port on Startup' tick box
Select the 'Default Serial Port:' to the device name the Z88 is connected to.
Click the 'Refresh' box and click OK.
An intelligent guess is made at which Serial Port is being used. Here is your chance to check that the correct one has been selected. In this case Windows is using COM 5.
Getting control of Eazylink can be difficult to do initially because Eazylink2 is expecting the pop-down to be running on the Z88. Just keep waiting until you receive the Reading Z88 Devices Command Failed Command Error window.
Choose 'Ignore.'
What you really need to see is the top Eazylink Menu not being greyed out
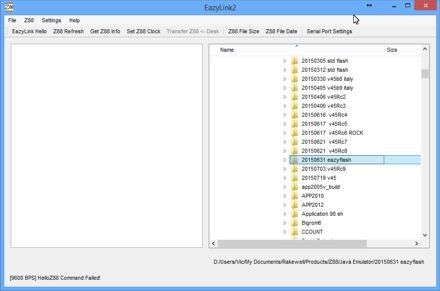
Select the Directory to be used
Here is a picture of the blank screen you should see. The left-hand window (normally used to show the Z88 side) is not used in this Imp-Export Mode. The right-hand side window showing the Desktop side is used. Select which Directory is to be used here. The selection of the files are made in a different window later.
Send to the Z88
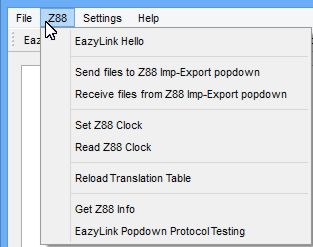
On the top menu bar, Select Z88
Communication not established
If all the functions are greyed out in the Z88 Menu, communication to the Z88 has not been established. Check that the cable is connected to the Z88 and Connect the Z88 to the Desktop has been followed.
- Select - Send files to Z88 Imp-Export popdown
If 'Show Details...' is selected, you will be presented with a help screen listing instructions (without the screen shots) on how to use the Z88.
On the Z88 it is a good idea to make sure you have additional RAM in slot 1 and Resetting the Z88 before starting this exercise unless you want to keep the files that are already on the Z88.
1. Start Z88
Select Panel
Use S
Change Default device to :RAM.1 - You need extra RAM in your Z88 for the file and it needs to be in slot 1.
Check that the Transmit and Receive rates Parity (9600) and change the default Xon/Xoff settings from (Yes) to (No) are the correct value as given.
Scroll down to the next instruction.
2. Select Imp-Export
Use X
Scroll down to the next instruction. 3. the Imp-Export Menu will be displayed
3. On Z88, select B)atch receive
by pressing 'b' and then press the key.
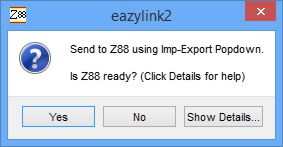
On the Desktop, click 'Yes' to 'Is Z88 ready?'
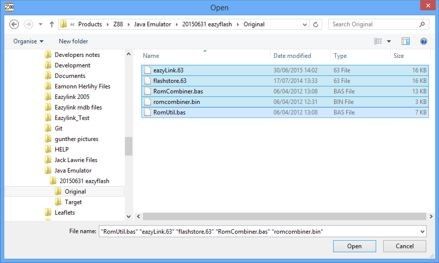
The Desktop will now display a window for you to select which file(s) to send
Mark the desired files. These are:-
| Download Location | ||
|---|---|---|
| Eazylink | FlashStore | |
| Eazylink 5.2.3-06 | Flashstore 1.9.3 | |
| Files Required | eazyLink.63 | flashstore.63 |
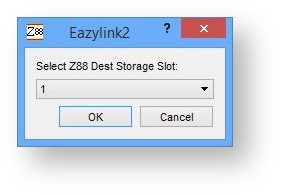
Select the Z88's destination storage slot (in this case Slot 1).
After press OK the Z88 screen will show
Using remote name:  :RAM.1/the_filename
(Incrementing numbers on this row)
End of file
This will repeat itself until all the files are transferred.
Press on the Z88 to return to the Imp-Export Menu.
Note
Both these popdowns are 16K each. Might as well put both of them on the same card and use up the spare space if only Eazylink is used.
The files are shown here displayed in the Filer are:-
- eazyLink.63 & flashstore.63 - These are the image files for Eazylink and Flashstore.
- Romcombiner.bas, .bin & RomUtil.bas - These 3 files are required to blow the image to the EPROM card.
Running RomCombiner
To run the program, do the following:-
- Select BBC BASIC B. Type
- RUN "ROMCOMBINER.BAS"
The following screen is displayed.
EPROMs can only be programmed in Slot 3.
If an EPROM is being used in slot 3
Verify EPROM banks properly erased
Press V. followed by
- F
- 32
If the EPROM is properly erased the following screen is displayed.
If an error message is displayed,
the EPROM should be removed and erased again with the EPROM Eraser until it passes this test.
If a Flash card is being used in slot 2
Flash EPROM block erase
There is no point in checking whether it is erased or not, it can be erased here straight away.
Press F. followed by
- 256
- 2
To return to the main display.
Press 0 .
If a Flash card is being used in slot 1
Follow the instructions as above, except the Flash card is in Slot 1.
Press F. followed by
- 256
- 1
To return to the main display.
Press 0 .
Combine image files of cards
Press C. followed by
- A
- EAZYLINK
- A
- FLASHSTORE
Press C. for Create followed by
Destination card name? EAZYFLASH
Delete source images (Y/N)? N
Blow image files to an EPROM
From the main screen, Select
- B
- 3 and then the Card name
- EAZYFLASH
- F
The screen will flash a few times until the following screen is displayed. If any programming errors are given, the EPROM will need to be erased and this procedure needs to be repeated from Verify EPROM banks properly erased.
Blow image files to Flash Card (Slot 2)
From the main screen, Select
- B
- F
- 2 and then the Card name
- EAZYFLASH
- F
The screen may flash a few times until the following screen is displayed.
Blow image files to Flash Card (Slot 1)
This is similar to Blow image files to Flash Card (Slot 2) except to select Slot 1.
From the main screen, Select
- B
- F
- 1 and then the Card name
- EAZYFLASH
- F
The screen may flash a few times until the following screen is displayed.
If the 512K/512K Flash/RAM is in Slot 1, do a HARD RESET, otherwise
- Select
- Open the Card Flap
- Remove the 32K EPROM card from slot 3 or the Flash card from Slot 1 or 2
- Close the Card Flap
- Open the Card Flap
- Insert the 32K EPROM in slot 2
- Close the Card Flap
- Press the key to display the two new applications at the bottom of the list
Running Eazylink
To run Eazylink either select the INDEX with I or
or move the cursor over the application name and press .

