Creating OZ
Info
Whether you already have a copy of OZ or not the instructions here has to assume that a new copy is made. You can only use the built-in OZ to create or update an existing copy of OZ.
Which version to use?
Version 4.7.1
Users are able to download the version that the developers have issued
This version does not have the files required to run RomUpdate. See further down to collect the three extra files.
and these files in the file area.
to blow it into their own Flash cards.
Version 5.0 beta
Users are able to download the latest developer builds of OZ ROM and follow the additional instructions on that page - they have been changed.
The current and previous copies including OZ 4.7.1 are further down the page, by using these, you may be able to get back to where you were. Please make Backups of what you do.
There is another way to upgrade your Flashcard should this prove to be difficult.
- Get in touch with Rakewell who offer the service of
upgrading or supplying Flashcards pre-installed with OZ.
Prerequisites
- Desktop Installation
- Connect the Z88 to the Desktop
- Extra RAM fitted in slot 1. Large enough to receive and store all the files required.
- EPROM or Flash card to store the image (as a separate operation)
Preparing the Z88
IMPORTANT INFO
The Z88 needs to be running off the internal OZ supplied with the Z88. To ensure that this happens all existing information on the Z88 will be lost after following this procedure. Backup any important files beforehand.
Note: Decision Time
Before you start, you need to decide whether to use the Imp-Export or Eazylink mode. If you choose Eazylink, then you will either have a 32K EPROM card, or it will be blown into the 512K/512K Flash RAM card. See the previous section Creating Eazylink/Flashstore.
Hard Reset
With no cards in the Z88 at all, give the Z88 a Hard Reset.
Open the card flap
Insert the cards in the following configurations:-
Shut the card flap.
In the INDEX check that the Z88 recognises the extra memory by giving the CARD command. You should get the following result.
Imp-Export Mode 512K
Imp-Export Mode 1M Flash cards
Eazylink Mode - ROM in Slot 1
Eazylink Mode - ROM in Slot 2
Eazylink Mode - ROM in Slot 2
Eazylink Mode - ROM in Slot 2 with Blank flash card in Slot 3
If the values shown in the RAM do not display these values, take all the cards out again give the Z88 a Hard Reset and go round the loop again until the values are correct.
Press to return to the main screen.
Set Default Device
Set the default device to the RAM that is being used by selecting the Panel S. Move the cursor just past the 0 in :RAM.0 in the Default Device field:-
Press the key
and replace it with a 1.
Select Device
Select the Filer F .
Press SV to Select deVice
Move the cursor over to the right (using , then press the key to remove the number that is there, finally type in the RAM slot number 1 then press to select it.
Preparing the Desktop
Downloading Files
Download from the project file area the files needed to transfer to the Z88. If they are zipped, unzip all the files on the Desktop Computer and save them all in a directory.
Check that you have downloaded the 4 RomUpdate files which are now in two separate locations (OZ 4.7.2. and RomUpdate).
Note - File name changes
| 512K Flash | 512K Flash | 1M Flash | RomUpdate files | |
|---|---|---|---|---|
| OZ 4.7.2 | ozrom-V4.7.1RC-46cdda4.zip See above | romupdate.cfg | ||
| RomUpdate | RomUpdate (Z88 application & BBC BASIC) | romupdate.bas romupdate.cli romupdate.crc |
The extension (i.e. .52 .53 ...) remain the same.
UPDATED USE TO CHECK FILES REQUIRED
The example below has been updated. The current version being used is v4.7.1 There are no files in the file area.
The RomUpdate files were initially supplied, but they are no longer there in the later versions. See above where they are.
| Download Location | ||
|---|---|---|
| OZ V4.x Release Notes | ||
| OZ 4.7.2 | ||
| 512K Flash | 1M Flash | |
| Files Required | ozs1-46cdda4.32 | This needs to be updated. RomUdate will put the image Use RomCombiner to delete |
| Imp/Export | 20 minutes 45 seconds | |
| Eazylink | 8 minutes 55 seconds. | |
| OZ 4.5 + CRC | 5 minutes 28 seconds | |
Using Imp/Export Mode
Start Eazylink2.
If you want to use the Eazylink Mode, go to Using Eazylink Mode
For convenience This section has been copied from the Eazylink2 User Guide.
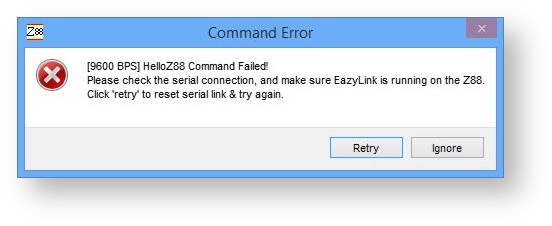
This can be difficult to do initially because Eazylink2 is expecting the pop-down to be running on the Z88. Just keep waiting until you receive the Reading Z88 Devices Command Failed!
Choose 'Ignore.'
What you really need to see is the Eazylink Menu not being greyed out.
Select the Directory to be used
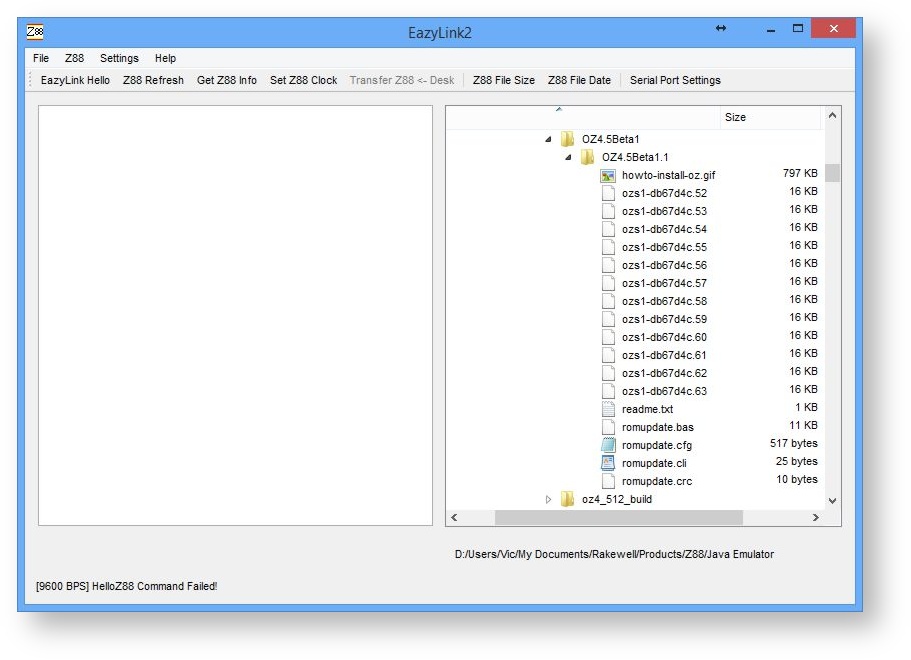
Here is a picture of the blank screen you should see. The left-hand window (normally used to show the Z88 side) is not used in this Imp-Export Mode. The right-hand side window showing the Desktop side is used. Select which Directory is to be used here. The selection of the files are made in a different window later.
Send to the Z88
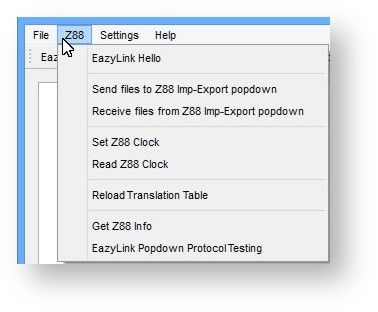
On the top menu bar, Select Z88
- Select - Send files to Z88 Imp-Export popdown
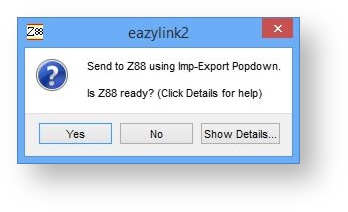
If 'Show Details...' is selected, you will be presented with a help screen listing instructions (without the screen shots) on how to use the Z88.
Send files to the Z88
1. Start Z88
2. Select Imp-Export X
Scroll down to the next instruction. 3.
the Imp-Export Menu will be displayed
Type 'b' and then press the key.
Now you can click 'Yes' to 'Is Z88 ready?'
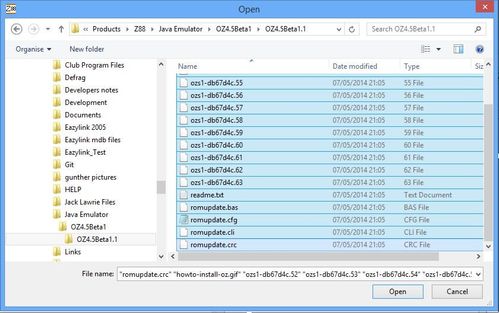
The Desktop will now display a window for you to select which file(s) to send.
Mark the desired files. These are:-
Note - File name changes
| 512K Flash | 512K Flash | 1M Flash | |
|---|---|---|---|
| OZ 4.5 | ozs1-90a181d | oz45ex | oz45ex |
| OZ 4.6.1 | ozs1-eb06239 | oz461ex | oz461ex |
The extension (i.e. .52 .53 ...) remain the same.
| OZ 4.5 | OZ 4.5 EXTRA 512K Version | OZ 4.5 EXTRA 1M Version |
|---|---|---|
ozs1-90a181d.52 | oz45ex.32 oz45ex.33 oz45ex.34 oz45ex.35 oz45ex.36 oz45ex.47 oz45ex.48 oz45ex.49 oz45ex.50 oz45ex.51 oz45ex.52 oz45ex.53 oz45ex.54 oz45ex.55 oz45ex.56 oz45ex.57 oz45ex.58 oz45ex.59 oz45ex.60 oz45ex.61 oz45ex.62 oz45ex.63 romupdate.bas romupdate.cfg romupdate.cli romupdate.crc | oz45ex.0 |
Note
There are more files sent than needed. This is the standard developers listing. Select all the files needed for slot 1 xxxxx.52 to xxxxx.63 and all the 'romupdate' files.
Warnings will be given for invalid file-names selected. e.g. howto-install-oz.gif
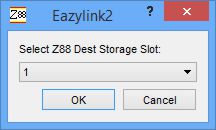
Select the Z88's destination storage slot (in this case Slot 2).
After press OK the Z88 screen will show
Using remote name:  :RAM.1/the_filename
(Incrementing numbers on this row)
End of file
This will repeat itself until all the files are transferred.
Press on the Z88 to return to the Imp-Export Menu.
Files are download on the desktop
RAM and Flashcards are set up
Eazylink is on the Z88
Using Eazylink Mode
For convenience This section has been copied from the Eazylink2 User Guide.
Start Eazylink2.
Start Screen
Here is a picture of the blank screen you should see. The left-hand window is used to show the files on Z88 side. There are no files on this Z88, hence the blank screen, but that will change soon.
Running for the first time
Follow this procedure:-
Quick Menu
Most of the following commands can be selected from this menu. Select
EazyLink Hello
The first time Eazylink is connected to the Z88 the Com Port window is displayed. This can also be selected with the
Serial Port Settings
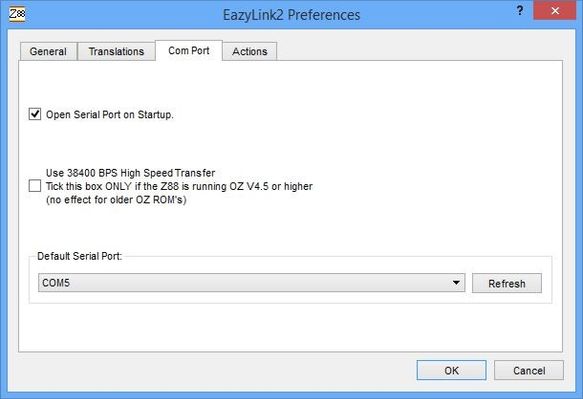
An intelligent guess is made at which Serial Port is being used. Here is your chance to check that the correct one has been selected. In this case Windows is using COM 5.
If the Eazylink pop-down is running under OZ 4.5, selecting the "Use 38400 BPS High Speed Transfer" will enable this.
Command Error
You may initially get this screen
Choose 'Ignore.' and try again.
Select Z88 Device
As :RAM.1 is set as the Default Device on the Z88. :RAM.1 is selected. If the files are to be saved to a different device, select the Tab now.
The right-hand side window showing the Desktop side is used. There is a program that can be run to check that the connection is working correctly.
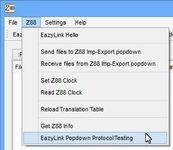
Eazylink Popdown Protocol Testing Program
This only works with the Eazylink popdown and is useful to check whether the hardware or USB to Serial ports are working as expected with the Z88. To use it, connect the Z88 to the Desktop and run the Eazylink popdown on the Z88.
It is selected from the Z88 Menu.
A report is generated which should have all TRUE statements in it. An overall test message is displayed in the bottom left-hand corner.
If there are any FALSE statements, the test has FAILED. The serial port connection is not working correctly and help should be sought.
WARNING -No point going any further!
There is no point going any further until the protocol testing program passes all the tests. Go to Problem Solving Area to get some clues there.
Z88 Commands
Z88 Refresh
If the information received looks a bit suspect try using this command.
Send files to the Z88
Z88 Select Device
As the Default Device was set to :RAM.1 on the Z88, this device is already selected. If a different device is required to save the files to, change it now by selecting a different tab.
Desktop Select Files
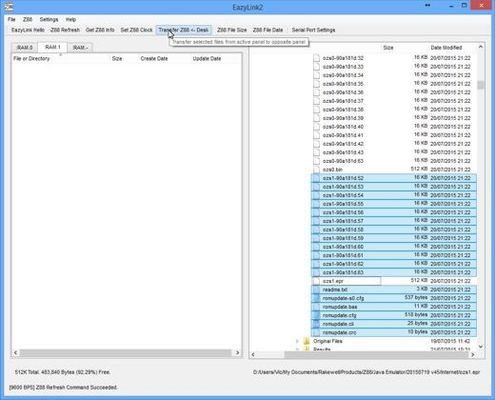
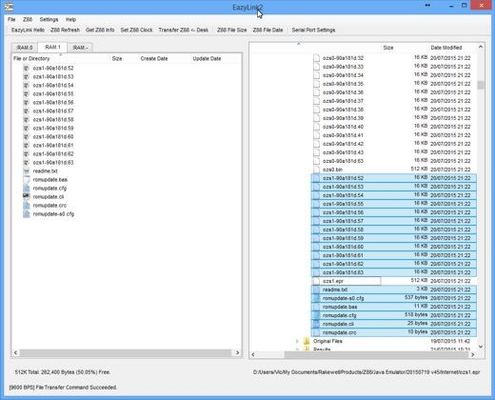
In the Desktop window select the files to be transferred
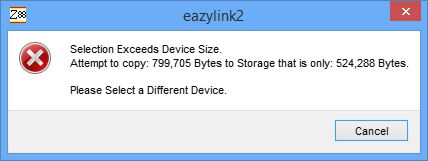
Selection exceeds Device Size
Note: Notice missing file
Have you noticed that there is a file not marked in the list? This file is a 512K binary file for the complete space. If this was selected, there would not be RAM on the Z88 to store them. Before files are transferred, a calculation is made to check if there is enough space to save all the selected files. This is the message received (with different values) if there is not enough room.
Transfer Z88 <- Desk
Click on the "Select Transfer Z88 <- Desk" button
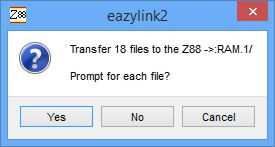
A prompt is given, just to make sure this is what you want to do.
Select No to save prompting,
Progress may be monitored viewing the bottom of the screen.
together with the speed of transfer and the full file name showing a very long directory tree.
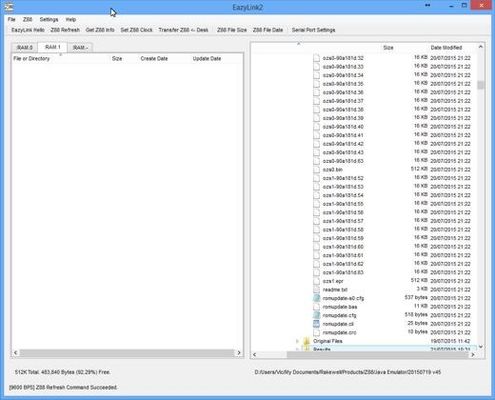
At the end of this the following screen will be presented with the transferred files also shown on the Z88.
Upload all the files to :RAM.1
On the Z88
Using ROMupdate
Select Filer
1. Hold down the key (at the bottom left of the keyboard) and press the F key, to enter Filer.
Alternatively it may be selected by pressing the key at the lower left of the keyboard and then using the key, move the cursor down to the Filer application.
Press to select it.
Using 512K/512K Flash/RAM
Using 1M Flash
Add 1M Flash card in slot 3.
Select File
The file romupdate.cli needs to be selected. This file is one of the files downloaded and will displayed somewhere on the right-hand side window.
Move the cursor to the right using key to get into that window and then the other cursor keys until the cursor is over that file name.
Select that file by pressing the key.
Execute ROMupdate
Press EX to EXecute or move the cursor back to the left into the command window. then using the key, move the cursor down until that command is displayed in the COMMANDS window, then press to select it.
The .cli file will be EXecuted and will run the "romupdate.bas" program.
- This program checks that the downloaded files are correct,
Sometimes the display looks corrupted
Sometimes the display looks corrupted. This is normal and you should just WAIT. Eventually you will see a HARD RESET and the Z88 will boot into the new copy of OZ created.
- Displays "Select slot to write bank binaries ( to start writing): 1" Select 1 for the 512K/512K Flash/RAM card or 3 for the 1M.
- Erases the Flash card selected slot
- blows the OZ ROM into the card
- finally, the card is inserted in slot 1 (if not already there), followed by a hard-reset issued by the Z88 user.
- OZ in slot 1 is booted and is ready for use (original ROM in slot 0 is no longer running)
You can check that you have the correct version by selecting the key and then the cursor key to display the version screen as shown at the beginning.
IMPORTANT:
You cannot blow the OZ ROM images to slot 1 if you're already running OZ in that slot.
Updating a Z88 with an internal Flash Chip
There may be some users out there that have a modified Z88 with an internal 512K Flash chip fitted. You can update an internal flash chip in a similar way to updating the external flash cards using ROMupdate.
Here is what you do.
1. Go to the release summary Release Summary
2. Chose the latest version (it is v4.6.1 at the time of writing this) OZ v4.6.1 Release Notes
3. Download the zip file using the download link located further down the page.
4. Unzip the files on your desktop computer
5. Before uploading the files to the Z88, make sure that the Panel Default Device points to expanded RAM, typically :RAM.1
6. Transfer the 13 binary files (ozs0-xxxxxxx.xx) and
romupdate.bas
romupdate-slot0.cfg
romupdate.cli
romupdate.crc
7. Rename romupdate-slot0.cfg to romupdate.cfg
8. From the FILER execute the "romupdate.cli" file with EX command.
9. The display will flash and do all sorts of things, this is normal, LEAVE IT ALONE AND WAIT...


