Pilots Companion
About Aviation Planning Tools
AVIATION SOFTWARE TOOLS 1988
Colin Marshall, Ian Green Mathon Road, Malvern Worcestershire, WR14 4BU
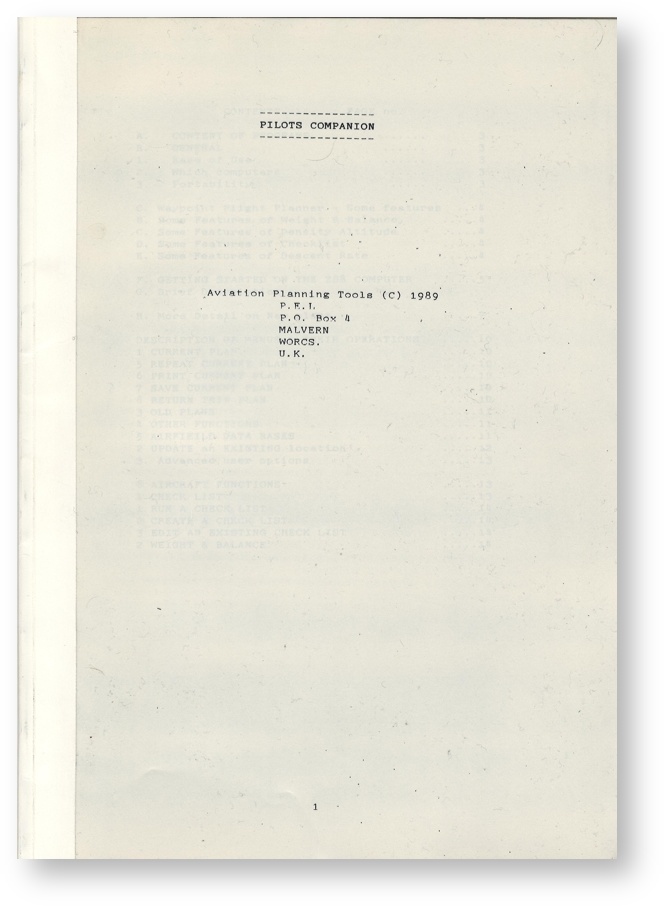
I was given a copy of Pilot Companion and the manual in 1989 to evaluate. Did anyone use it? Was it well marketed? I never heard of it again.
The company was based in Malvern, their address was P.E.I. P.O. Box 4 MALVERN Worcs., but they are no longer there. So here is your chance to trawl with me through the commands and get an understanding what this program did.
Pilots Companion
Download
| Manual | EPROM | |
|---|---|---|
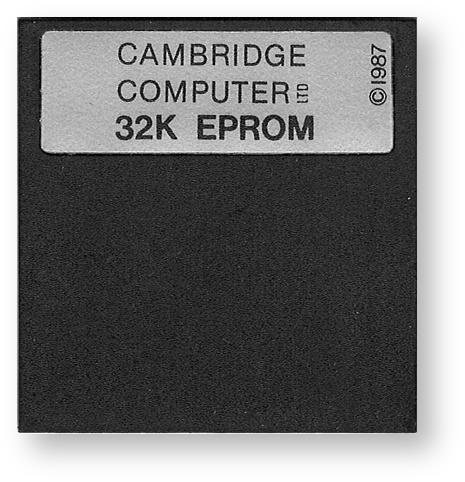
This applications needs 32K of either EPROM or Flash space.
Introduction
Pilot Companion by Aviation Software Tools is written in BBC BASIC for the Cambridge Computer Z88 portable. It is a Flight Planner for Pilots.
It has several 'built-in' databases with Airfields, NDB, VOR. The user is invited to create, append,
The standard MENU and HELP facilities are not used in this application. The user will need to read this manual first to get a good overview of the product before use.
Menu
Pressing the MENU key reveals 'no topics.' The Menus are in the main program itself.
A. CONTENT OF PROGRAMS
The Pilots Companion suite of programs contains the following:-
- Flight Planning
- Weight & Balance
- Density Altitude
- Descent Rate
- Checklist Generator
B. GENERAL
1 Ease of Use
The Pilot Companion is menu driven, all of the above being activated from menus. Uncomplicated input output are design goals. Clarity of output with the elimination of unnecessary information both on the computer display and on the paper printout are further goals. A 'See at a glance' philosophy has been pursued and we hope we have achieved the best possible implementation with the given hardware.
2 Which computers
Primarily Pilot Companion has been designed to run on the Cambridge Z88 portable computer.
Pilots Companion will also run on most of todays standard personal computers & printers.
The program is aimed in particular at
- portable and
- pocket types
and contains a number of features to exploit the advantages of these.
3 Portability
With Pilot Companion you can now take a FULL FEATURED WAYPOINT PLANNING PROGRAM with you on your flights. This gives you the advantage of changing your flight plan part way through your trip - either in the air or on the ground a change of wind conditions, destinations etc. are quickly incorporated. Additionally an in-flight countdown timer is included at each waypoint. This works in conjunction with the real time clock giving you your estimated arrival time at a glance.
A. Waypoint Flight Planner - Some features
Contains all features necessary to generate a navigation flight plan with complexity reduced to a minimum menu driven at each stage it should be possible to generate a plan without external reference.
- Create multi-waypoint flight plans
- Save multi-waypoint flight plans for future recall
- Use flight plan in real-time on portable computer display
- Create your own databases of airfields or locations
- Use built in databases of airfields ,VOR's & NDB's
- Paper printout of the plan on portable or other printer
- Define new locations or waypoints by latitude & longitude or by distance & bearing to a known remote reference
- Rapid repeat of the same plan over again changing wind, aircraft speed etc. if necessary
- Return trip flight plan generated on request
- Update feature to incorporate changes in a locations data such as frequency changes or relocations of VOR's etc.
- Add feature to incorporate new locations
- Create separate location or waypoint lists or add them as you write the flight plan
- Show the contents of any database of locations
- Estimated arrival time displayed in flight
B. Some Features of Weight & Balance
This option is general to all light aircraft requiring the usual details. These are requested in a question and answer type format so that you don't forget anything. A specific version for the Robinson R22 helicopter is also available.
C. Some Features of Density Altitude
The usual question and answer type operation, give your indicated altitude, pressure & temperature, and get the density altitude. Also gives true airspeed if required for the density altitude calculated.
D. Some Features of Check list
This feature allows you to create your own personalized lists for each aircraft and save them for recall.
Each item is displayed one at a time, you bring up the next check having carried out the previous one possibly walking round the aircraft with the computer. No more losing your place in the list!
E. Some Features of Descent Rate
Here you can obtain either your required descent rate from a given distance to run or give your required descent rate. The program will tell you when to begin the descent.
F. Starting the program on the Z88 Computer.
Pre-Flight Requirements
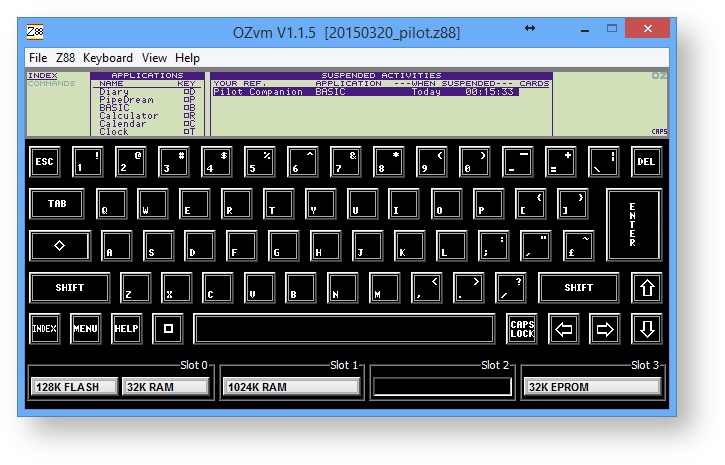
The requirements to run this program on the Z88 is at least 128K RAM in slot 1 and the Pilots Companion EPROM to be in slot 3. The EPROM may be moved after running the program.
For best results: Give Z88 a HARD RESET
Please BACKUP ALL YOUR DATA before using Pilots Companion.
For best results, (if you have nothing running on the Z88) Pilots Companion can be started initially by giving the Z88 a Hard Reset, with the Pilots Companion's EPROM card in slot 3. The boot.cli file starts a chain of commands that sets :RAM.1 as the Default Device, fetches all the files from the EPROM card and starts running the program. This ensures that the Z88 is at a known state. To leave the program press the key. Alternatively use the following methods depending what state the Z88 is in.
- If Pilots Companion is already shown in the index list of running Applications.(Press to view). Position the curaor over the name and press .
- If Pilot Companion has already been used it will appear in the SUSPENDED ACTIVITIES area of the index from which it can be re-selected using the cursor bar.
When it is running, when in the INDEX it will be shown as a suspended activity with the file name used as YOUR REF. There can only be one Pilots Companion application running
Position the cursor on the name & press Pilot Companion files are resident in the computer having been loaded from the plug in EPROM cartridge but not shown in the index list of running applications.(Press F to view Files - the main program is called 'way2'). Enter BBC BASIC and type
RUN "WAY2"Note that if the program returns to the BASIC prompt at any time then typing
RUNwill start it again.Pilots Companion is on EPROM and your computer is in use
ANote the following procedure will delete any running applications so first save any required information to files.
Plug the Pilots Companion EPROM into slot 3 on the Z88. Ensure Slot 1 has at least 128K of RAM Plugged in..'
Press, the Diamond key () and then type PURGE
The required files will, now be loaded from EPROM this will take a little time finishing with the Pilots Companion first menu being displayed.
The EPROM may now be removed and from now on methods 2 or 3 above can be used to start the program. Most pilots will want to leave the Pilots Companion resident as updates to preserve temporary updates.
B Alternatively fetch the file boot.cli from the Pilots Companion EPROM and Execute the file. This will then load all required files and start the program.
- Pilots Companion is on EPROM and your computer is new.
Plug the pilots companion EPROM into slot 3 on the Z88. Plug 128K RAM pack into slot 1 on the Z88.
Press the Diamond key (), then type PURGE (This is the same as pressing the reset button),
It is advisable to delete files in RAM.- on the Z88 This can be done manually or by executing the program ERAM from the files menu of the Z88;
If required all files from EPROM could be copied-manually then 3 above actioned.
G. A Brief description of the General function of the Flight plan
A plan is developed beginning with the new plan option (opening menu option 2).
Once this plan has been completed it becomes the current plan (option 1 of the opening menu). Actions on the current plan are taken from this option i.e. to
- re-run the plan and maybe
- change wind, airspeed etc.
- to print,
- to run the return trip,
- or to save this current plan.
Old plans saved from previous use may be recalled and become the current plan. These old plans are retrieved using option 3 of the opening menu.
A most useful feature of this program is the ability to restart at any time this is achieved by pressing the key on the top left hand corner. (Commonly known as the OH! shit button). This allows you to play with features ad hoc and and recover at any time. The best way to find out how it works is to keep pushing buttons - it’s really very easy.
Once you find out how easy it is to generate a plan you will never want to revert to the old manual planning methods.
When running through a completed current plan the display he stopped by pressing the key. .At this point the caption *display held * is shown. If the letter T is pressed followed by key the in-flight timer starts. Pressing will continue on to the next waypoint. The key may be used to speed through waypoints if desired.
H. More Detail on NEW PLAN
- (select option 2 on the opening menu). The following appears on the display
The above message is displayed on the screen. Ensure that is selected then type in the full name of the airfield from which you wish to begin your journey. Press the key and the computer will then begin to search for the place name you have typed in. When the place name has been found the message requesting you to enter the next point in your flight is displayed i.e.
ENTER WAYPOINT NO.(1) ?
if the search for the place name, is unsuccessful then a not found message and menu is displayed. This is discussed later in this section but if you think you have misspelt the place name, select item 1 of the menu by typing 1, then press and re-enter your place name with the new spelling.
Remember you can press to restart everything if you wish this will return to the opening menu.
To enter a VOR or NDB the following format should he used as for the Honiley VOR which the identifier code is HON.(Use idents, not the name).
VOR HON
The space between VOR and the ident HON must be included. For an NDB use the same format i.e.
NDB SVN
ENTER WAYPOINT NO (1) ?
This is displayed if the search for your place name was successful. Now type in your next point in the journey i.e. the first destination point. Press and the search for this place will begin
If you are still at the initial stages of learning how to use PILOTS COMPANION then use another airfield name at this stage in the game to speed the production of your first plans. (You can find out how to enter and save self-derived points later on in this manual.)
If the search for WAYPOINT NO.1 was successful then the message
ENTER WAYPOINT NO.2 ?
will be displayed.
To end your plan press at this point or continue the plan by typing in more waypoints as described above. Pressing at the ENTER WAYPOINT NO. message will indicate there are no more points.
The plan routing is now displayed giving the Latitude & Longitude of each place along with its It letter identifier, (if there is-no identifier then the first 4 letters of the name are used in the case of airfields.) You may hold the display by pressing to inspect the plan and verify the information provided is correct. To continue the program press again.
if the display is not held then the program runs on automatically after a few seconds..
In either case the details menu is now displayed as follows :-
| WIND DIRECTION | = | (in Degrees true) |
| WIND SPEED | = | (in Knots) |
| AIR SPEED | = | (of aircraft in Knots) |
| FUEL CONSUMPTION | = | (of aircraft in galls/hr) |
| MAGNETIC VARIATION | = | (in deg & East or West) |
ARE THESE CORRECT ? (Y) ?
If the details are correct then press (or Y and press )
The details will then be used as given to generate the plan. From this point the whole flight plan is produced automatically the displays running through each stage without further manual input. If you wish to hold the display at a point then press - the screen will now be held until is pressed again.
The final screen after the last Waypoint and destination are displayed gives details used to produce this plan along with total distance, total time and total fuel used. This display may also be held using as described. The program returns to the opening menu after this display.
The plan you have just completed now becomes the current plan and if option 1 on the opening menu is selected then the current plan menu is displayed This gives options to display the current plan again giving you the opportunity to change the details -wind etc. required or simply repeat the plan again.
Other options are to produce the return trip plan -this is generated automatically by selecting this option. Printing the plan to a paper printout can be from this menu. The plan may also be saved for future recall here.
Further operations on the DETAILS menu
If the details as shown on the display at the point indicated above were not correct then type N and press . The alter details menu is now displayed.
The values shown inside the brackets at each menu line are the default values and pressing will give this value. To alter a value simply type in the required number followed by . Follow the instructions as given in the display.
Now follows a description of the display.
that the paper printout contains an identical layout and detail.
- The display is split into 2 columns. The left hand column contains the highest priority information the topmost being your required heading.
The right hand column contains lower priority information but will still be useful en-route. - The following words appear on this display.
required parameters are taken from the details menu as given.
The left hand column contains:
| a: HEADING - | point the aircraft this way to get to your destination. This is the heading corrected for wind and magnetic variation. |
| b: TIME ENROUTE - | the time in hours and mins for this leg of the trip |
| c: FUEL USAGE - | fuel used for this leg of the trip in gallons |
| d: GROUNDSPEED - | airspeed corrected for wind in Knots. |
The right hand column contains :
| a: DEPARTURE - | point to DESTINATION point (IDENT or FREQUENCY) |
| b: DISTANCE - | in nautical miles between the departure point and destination point.(great circle) |
| c: TRACK TRUE - | required track uncorrected |
| d: BEARING (radial) - | track true corrected for magnetic variation only. This is the TO Radial of a VOR in effect. |
At the end of the plan-the following are displayed the left hand columns showing the values of windspeed and direction, airspeed, fuel consumption and magnetic variation used in the current plan computations.
The right hand side columns give totals of Distance, time and fuel used for the complete trip. The printed version of the plan is also timed and, dated at the time of printing.
9) Returns automatically to the opening menu.
2 New Plan - Example
Select 2.
Point of departure OXFORD is found. NORTHLEACH ROUNDABOUT is not.
The four choices are:-
(1) RE-ENTER NAME OF 'This waypoint'
Enter a different name.
(2) ENTER POSITION OF 'This waypoint' BY LATTITUDE & LONGITUDE
See Defining Waypoints for more details.
(3) ENTER POSITION OF 'This waypoint' BY RELATIVE LOCATION
See Defining Waypoints for more details.
(4) EXIT TO MAIN MENU
The program returns to the Main Menu.
Select (2) Enter position of 'This waypoint' by Latitude & Longitude
Look up position (Lat & Long)
Look up the VRP
** BRIZE NORTON
0,51:50.250N,001:50.150W,0F,W,000 A40 NORTHLEACH ROUNDABOUT VRP
** BRIZE NORTON (ENR 2.1)
Enter Latitude and Longitude.
Select Y when the data is correct.
Look up position (Lat & Long)
EGBO:N/A:WOLVERHAMPTON:HALFPENNY GREEN:ENGLAND:52:31:03:N:02:15:35:U:0282
EGBP:N/A:KEMBLE:PAILTON:U.K.:51:40:05:N:02:03:25:U:0433
EGBS:N/A::SHOBDON:U.K.:00:00:00:U:00:00:00:U:0000
Enter another new way point for Kemble.
No more way points, press to continue,
To check headings, no wind data ia entered,
DESCRIPTION OF MENUS and THEIR OPERATIONS
Main Menu
To select a function on the menu, select the number that is required.
1 CURRENT PLAN
Selection calls the following menu :
Selecting current plan gives four further choices. This means that a New Plan needs to be made before using this function.
5 REPEAT CURRENT PLAN
Selects the currently resident plan and runs through it. It is possible to change details such as airspeed, wind, magnetic variation etc. during this operation when requested if required.
5 Repeat Current Plan - Example
Check the route
Enter the current wind (no wind calculations as default)
Current route.
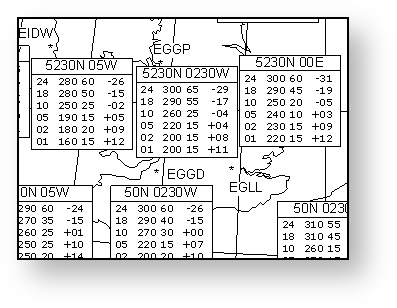
Look at the same route with wind calculations. 5230N 0230W @ 2000 ft. 200 15.
The heading is now 331 (instead of 339 with no wind). Is this what is expected?
Track (magnetic) 339
Wind (from 200 (lower number))
Need to draw diagram on map
6 PRINT CURRENT PLAN
Initiates paper printout of the current plan. It is possible to change details such as airspeed, wind, magnetic variation etc. during this operation when requested if required.
If the printer is not connected then the display of the printout will halt indicating this. Pressing will effect a return to the main menu.
after Printing
7 SAVE CURRENT PLAN
Initiates the save sequence requesting a name for the current plan to be saved under. Using the first three letters of the departure point together with the first three letters of the destination is one method of ordering your old plan names but any name may be used.
that the airspeed, wind etc. used in your original plan will also be saved and associated with the plan. These values will be used on Initial recall of the old plan.
7 Save Current Plan - Example
OX-WELLSB.SET and OX-WELLSB are generated.
8 RETURN TRIP PLAN
Selects the menu :
Imitates the sequence for the reverse flight plan trip, starting with the original destination point first. The details of airspeed, wind etc. may be changed when requested if required.
1 - Display Return Trip - Example
Select 1 Display Return Trip.
Check the route
Enter the current wind
Return route.
2 PRINT RETURN TRIP
Initiates the paper printout of the return trip plan. If the printer is not connected the display will halt after a few characters. Pressing will return to the main menu.
2 NEW PLAN
Selection of this option initiates the formation of a new flight plan the operation is described above in this document.
3 OLD PLANS
To retrieve a stored plan select this option and enter the file name of the plan to be retrieved as requested. Note that the details of .airspeed, wind etc., used in the original plan will also be restored. When retrieved the old plan becomes the current plan and can be manipulated as any other current plan.
It is possible to view the file names of plans already stored.
No OLD PLANS have been saved in the example, hence the BLANK SCREEN.
This is achieved by typing ? at the file name prompt.
This in fact lists the files with the suffix .set which is not needed for file recall. Care is needed using this facility and must be pressed to return back to the program after reading the file list has been completed.
Pressing other keys may cause problems with the Z88 operating system! You have been warned.
3 Old Plans - Example
Load previously saved plans here.
4 OTHER FUNCTIONS
SELECTING THIS OPTION CALLS THE FOLLOWING MENU
Two more functions are selected here.
5 AIRFIELD DATA BASES
There are 3 choices. The first two asks
1 ADD a NEW location
1. ADD a NEW location
This selects the menu:
Defining Waypoints
There are two ways of defining waypoints.
1. Use latitude & longitude ?
The sequence entered requests firstly the name of the location you wish to add to the data base. This should he a unique name you wish to refer to or in the case of a vor or ndh use the ident code. You are next requested to enter the latitude of the location. It is necessary to use the format indicated (123456N i.e. degrees minutes seconds first letter of North or South as appropriate) otherwise it is not possible to continue with the: process.
Next longitude is requested in the same format. This may have two or three digits in the degrees element and the first letter of East or West as appropriate.
Finally the IDENT CODE is requested. There is no fixed format for this but the inbuilt data bases use the following convention:
- If one exists, use the 4 letter airfield ident code
- If no code exists use the first 4 letters of the name
- If it is a vor or ndb give the frequency
Data required to add a new location are:-
- NEW WAYPOINT Name
- Latitude (123456N)
- Longitude (123456W)
- Ident (ABCD)
1 Use Latitudes & Longitudes? - Example
USE DMS FORMAT
Latitude & Longitude can be given either as a decimal value or in Degree, Minutes and Second format.
Pilot Companion uses DMS. Using the wrong unit ensures errors.
The positions of Airfields for example are given in Latitudes & Longitudes. These are found in the Aerodromes published in the UK AIP.
Local VORs are given on main Airfield sites.
Look up position (Lat & Long)
Look up the VRP
** BRIZE NORTON
0,51:50.250N,001:50.150W,0F,W,000 A40 NORTHLEACH ROUNDABOUT VRP
** BRIZE NORTON (ENR 2.1)
2 Use Relative Locations? - Example
Waypoints etc may also be defined using relative location method i.e. angle and distance, generally this less, accurate please check the results of all computations.
When using relative locations, to describe the waypoint, the following information is required.
- A KNOWN LOCATION that is in the database is chosen as a start point.
- The TRUE BEARING from the KNOWN LOCATION in DEGREES TRUE
- The DISTANCE between the WAYPOINT and the KNOWN LOCATION (in naut,mls)
- A UNIQUE NAME for this waypoint.
- An IDENT CODE for this WAYPOINT
The result is given in Latitudes & Longitudes and give a unique name. The example below shows an abstract location 10 nM, 30 degrees from Oxford.
2 UPDATE an EXISTING location
Data required to update an existing location are the same as above:-
- NEW WAYPOINT Name
- Latitude (123456N)
- Longitude (123456W)
- Ident (ABCD)
This is the option used when the location already exists in the data base but some of its information has changed e.g. location or frequency etc. The subsequent menu selected is the same as for the ADD option If two entries with the same location name are made under UPDATE option the last one entered is used by the program i.e the most current entry is utilised. If two entries with the same location name are inadvertently made under the ADD option the later entry will not be accessed.
3 Advanced user options
WITH THE POSSIBLE EXCEPTION OF THE SHOW OPTION THESE SHOULD NOT BE USED UNLESS YOU KNOW WHAT YOU ARE DOING.THEY ARE NOT NECESSARY TO GENERAL OPERATION.
Primarily intended for the more computer literate user the options called here should be used with care in particular the create option destroys any existing content of the file being created.
This following menu is displayed:
4 SHOW a Data base ?
This option will display the content of a data base file.
Give the three letter file name and the content will be cycled through.
5 APPEND to existing database ?
This option allows further locations to be added to the end of any data base file. Follow the instructions given these are as for the ADDITIONS option which In itself would be more normally used.
Name of Database to modify? (WAV). Select a database to use.
1 Use Latitude & Longitude?
See Defining Waypoints for more details.
2 Use Relative Location?
See Defining Waypoints for more details.
I HAVE NOT MANAGED TO MAKE THIS WORK.
6 CREATE a New Data Base ?
This option allows the creation of independent data bases allowing the user to keep personalised data. A three letter file name must be used.
A location is then later accessed by first typing these three letters followed by a space and then the location name. Note that if a file name already exists the original contents will be lost using this option.
Example - Use the suggested file name.
Add a Record, or new entry - Example
Select 1 Use Latitudes & Longitudes
NORTHLEACH ROUNDABOUT
Look up position (Lat & Long)
Look up the VRP
** BRIZE NORTON
0,51:50.250N,001:50.150W,0F,W,000 A40 NORTHLEACH ROUNDABOUT VRP
** BRIZE NORTON (ENR 2.1)
Enter Latitude and Longitude.
Select Y when the data is correct.
See Plan a Flight on using some of these functions.
6 AIRCRAFT FUNCTIONS
This option produces the following menu
1 CHECK LIST
There are no check lists stored initially.
This option allows you to create your own personalised check lists for aircraft. The list when viewed is produced one line at a time the item should be checked then you may move to the next item by pressing .
(1) RUN A CHECKLIST
Type the number 1 followed by pressing the key to call this option.
The option requests the plane name under which you have stored the. Check list you wish to use. Items are stepped through one line at a time as they are checked off. (Press to continue to the next item in the list.
Type the in file name (without the .CHK) For example - PA28
The first item to be checked is displayed.
Pressing the key displays the next item. This is repeated until the end of the list is reached. The program returns to the Main Menu.
(2) CREATE A NEW CHECKLIST
This option is called by typing the number 2 followed by pressing the key.
First request is a plane name. You recall the list using this name so keep it short and one word only.
The first item in the list is then requested this should be typed in restricting it to one line only then press to move on to the next item.
Using PA28 as the Name of plane creates a file name of PA28.CHK
Type the first item that need to be checked, followed by the key.
Type the next item that need to be checked, followed by the key.
When the list is complete press at the item prompt without typing in anything else this will terminate the list. You may now use option 1 to recall the list using the plane name requested to call this particular list.
You may have a number of different checklists resident in this way.
Pressing twice ends inputting the list and saves the file.
(3) EDIT AN EXISTING CHECKLIST
Type the in file name (without the .CHK)
This option is called by typing 3 and pressing the key Each item line of the list is shown one at a time with the Options to insert, delete or accept an item are offered at each line of the check list. Use I,D or A for this at each line. Step through the list pressing A if the items are to be accepted.
The first item to be checked is displayed. Press
- (I) to insert
- (D) to delete
- (A) to accept
Pressing the key displays the next item. This is repeated until the end of the list is reached.
saves the updated data
leaves the data as it was before.
The program then returns to the Main Menu.
(4) TO EXIT
The program returns to the Main Menu.
2 WEIGHT & BALANCE
The manual states "Simply follow the menus for this option."
Lets see what this does with some data
Here is a table for Normal Loading
| G-BPFH | Fuel - AVGAS (US Gallons) | Empty Weight (lbs) | Arm (ins) | Moment (wt |
|---|---|---|---|---|
| Aircraft basic empty weight | 1592 | 87.4 | 139,182 | |
| Oil Weight (lbs) | 0 | 0 | ||
| Fuel - AVGAS (US Gallons) | 40 | 240 | 95 | 22800 |
| Front Passengers (lbs) | 500 | 80.5 | 40250 | |
| Rear Passengers (lbs) | 200 | 118.1 | 23620 | |
| Front Baggage (lbs) | 70 | |||
| Rear Baggage (lbs) | 142.8 | |||
| RAMP WEIGHT AND MOMENT | ||||
| Fuel allowance for engine start, taxi, and run-up | -8.0 | 95.0 | -0.76 | |
| TAKEOFF WEIGHT AND MOMENT (max 2550 lbs) | 2524.34 | 90.00615 | 227.206128 | |
| Min CG | 88.1664 | |||
| Max CG | 93 | |||
| RESULTS | Normal category | |||
Enter data
The data from the table above is entered.
- Empty Weight (lbs)
- Datum (in)
- Oil Weight (lbs)
- Datum (in)
- Fuel - AVGAS (US Gallons)
- Datum (in)
- Front Passengers (lbs)
- Datum (in)
- Rear Passengers (lbs)
- Datum (in)
- Front Baggage (lbs)
- Datum (in)
- Rear Baggage (lbs)
- Datum (in)
Result
The following result from Pilot Companion was obtained. It is within the calculations obtained from the table.
Press <ENTER> to continue
The program returns to the Main Menu.
3 DENSITY ALTITUDE
Enter some valid entries
Calculate Density Altitude
Calculate True Airspeed
4 DESCENT RATE
GIVE DISTANCE TO RUN 1
GIVE RATE OF DESCENT 2
QUIT 3
The program returns to the Main Menu.
Example
Plan a Flight
Let's go to AV8 restaurant at Kemble via Northleach Roundabout for lunch from Oxford.
Oxford - Kemble via Northleach Roundabout
Select
Select 2 New Plan
Point of departure OXFORD is found. NORTHLEACH ROUNDABOUT is not.
USE DMS FORMAT
Latitude and Longitude can be given either as a decimal value or in Degree, Minutes and Second format.
Pilot Companion uses DMS. Using the wrong unit ensures errors.
Select 2.
Look up position (Lat & Long)
Look up the VRP
** BRIZE NORTON
0,51:50.250N,001:50.150W,0F,W,000 A40 NORTHLEACH ROUNDABOUT VRP
** BRIZE NORTON (ENR 2.1)
Enter Latitude and Longitude.
Select Y when the data is correct.
KEMBLE is not found
Look up position (Lat & Long)
EGBO:N/A:WOLVERHAMPTON:HALFPENNY GREEN:ENGLAND:52:31:03:N:02:15:35:U:0282
EGBP:N/A:KEMBLE:PAILTON:U.K.:51:40:05:N:02:03:25:U:0433
EGBS:N/A::SHOBDON:U.K.:00:00:00:U:00:00:00:U:0000
Enter another new way point for Kemble.
No more way points, press to continue,
To check headings, no wind data is entered,
To save this plan see 7 Save Current Plan
Appendix
Files & Databases
The files that have been loaded into RAM.1 are as shown by the Filer.
Files | |||
|---|---|---|---|
| EPROM | RAM | Function | Detail |
| /boot.cli | boot.cli | Loads all files from the EPROM and runs the Program. | Change default RAM to :RAM.1 |
| /EPROMLOAD | EPROMLOAD | Used to Load Files from EPROM. | Program to fetch all files from EPROM to RAM |
| /settings.dbf | settings.dbf | ||
| /data.dbf | data.dbf | Airfields Database | |
| /way.dbf | way.dbf |
| |
| /UPD.DBF | UPD.DBF | ||
| /vor.dbf | vor.dbf | VOR Database | |
| /pos.cli | pos.cli | Print Screen OFF | #-P |
| /pon.cli | pon.cli | Print Screen ON | #+P |
| /ndb.dbf | ndb.dbf | NDB Database | |
| /eram | eram | Erases all Files in :RAM.- and starts Program. | Select :RAM.- erase files |
| /way2 | way2 | Main BBC BASIC Program | |
To get some idea of what data is there, here is a Pipedream view of the data.
rev and temp are used for the current plan.
Databases | ||||
|---|---|---|---|---|
data (Airfields) | vor | ndb | upd | way |
data.dbf(c) 1988ast | vor.dbf(c)1988ast | ndb.dbf (c)1988 | upd.dbf | WAY |
ABERDEEN | ADN | AQ | RTY | NEARAB |
571215N | 571838N | 570818N | 572359N | 572359N |
021155W | 021556W | 022411W | 020717W | 020717W |
EGPD | VOR 114.3 | NDB 336.0 | Q | Q |
ALDERNEY | BKY | ADN | ||
494225N | 515944N | 571608N | ||
021248W | 000359E | 021453W | ||
EGJA | VOR 116.25 | NDB 377.0 | ||
ANDREWSFIELD | BEL | AP | ||
515340N | 543940N | 520659N | ||
002705E | 061344W | 043334W | ||
EGSL | VOR 117.2 | NDB 370.5 | ||

