Imp-Export Mode
Introduction
This mode's primary role is to allow users to download files onto a standard OZ v2.2 or v3.0 Z88 so that a copy of the Eazylink popdown can be written to a Flash card or EPROM card on the Z88.
WARNING
Although it is possible, it is not recommended to use this method to download OZ 4.5 due to its size and lack of file checking facilities.
You should skip this section if you already have a copy of OZ4.x or Z88 Eazylink. Please go to Starting Eazylink on the Z88.
- Connect Z88 to the Desktop.
- On the Desktop, start Eazylink2
Restrictions:-
- It only allows saving and receiving files from the Z88's root Directory.
- Drag and Drop is not supported.
- Eazylink Popdown Protocol Testing is not supported
Prerequisites
- Desktop Installation
- Connect the Z88 (or BBC Micro) to the Desktop
- Extra RAM fitted in slot 1. Large enough to receive and store all the files required.
- EPROM or Flash card to store the image (as a separate operation)
Downloading Files
Download from the Internet the files needed to transfer to the Z88 and save them all in a directory.
On the Desktop start Eazylink2.
First time use
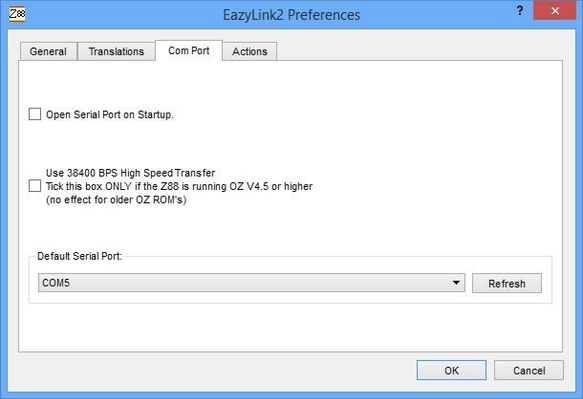
The first time Eazylink is connected to the Z88 the Com Port window is displayed.
The Com Port details will be displayed.
- Clear the 'Open Serial Port on Startup' tick box
Select the 'Default Serial Port:' to the device name the Z88 is connected to.
Click the 'Refresh' box and click OK.
An intelligent guess is made at which Serial Port is being used. Here is your chance to check that the correct one has been selected. In this case Windows is using COM 5.
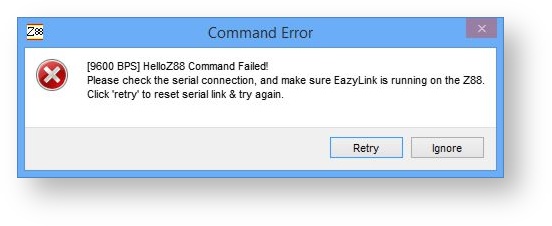
Getting control of Eazylink can be difficult to do initially because Eazylink2 is expecting the pop-down to be running on the Z88. Just keep waiting until you receive the Reading Z88 Devices Command Failed Command Error window.
Choose 'Ignore.'
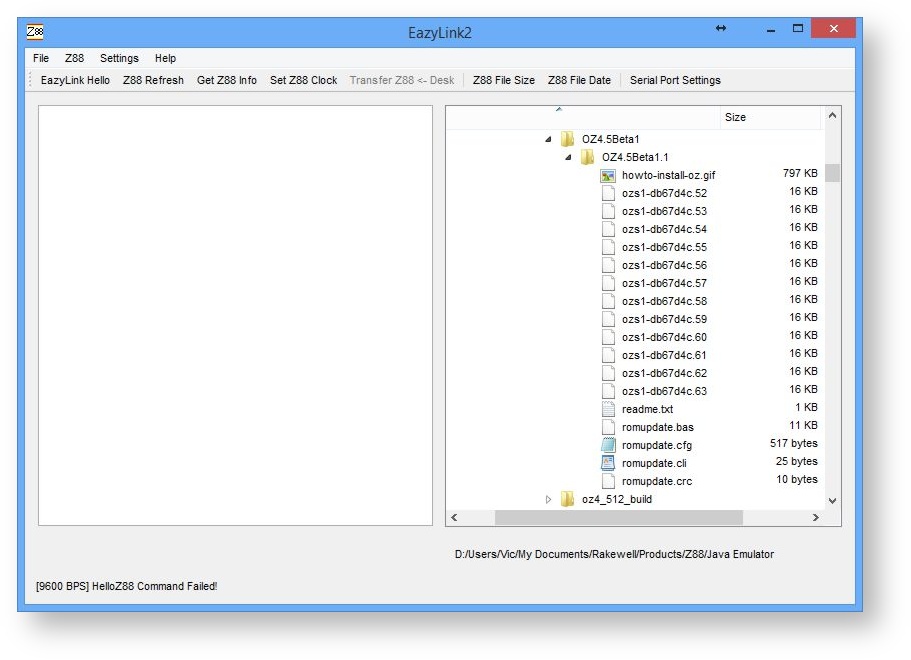
What you really need to see is the top Eazylink Menu not being greyed out.
Select the Directory to be used
Here is a picture of the blank screen you should see. The left-hand window (normally used to show the Z88 side) is not used in this Imp-Export Mode. The right-hand side window showing the Desktop side is used. Select which Directory is to be used here. The selection of the files are made in a different window later.
Send to the Z88 or BBC Micro
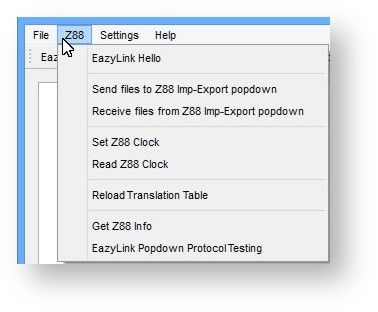
On the top menu bar, Select Z88
Communication not established
If all the functions are greyed out in the Z88 Menu, communication to the Z88 has not been established. Check that the cable is connected to the Z88 and Connect the Z88 (or BBC Micro) to the Desktop has been followed.
- Select - Send files to Z88 Imp-Export popdown
If 'Show Details...' is selected, you will be presented with a help screen listing instructions (without the screen shots) on how to use the Z88.
BBC Micro
Follow your software instructions on what to do on the BBC Micro. Functionally, they will be similar to those shown for the Z88.
Z88
On the Z88 it is a good idea to make sure you have additional RAM in slot 1 and Resetting the Z88 before starting this exercise unless you want to keep the files that are already on the Z88.
1. Start Z88
Select Panel
Use S
Change Default device to :RAM.1 - You need extra RAM in your Z88 for the file and it needs to be in slot 1.
Check that the Transmit and Receive rates Parity (9600) and change the default Xon/Xoff settings from (Yes) to (No) are the correct value as given.
Scroll down to the next instruction.
2. Select Imp-Export
Use X
Scroll down to the next instruction. 3. the Imp-Export Menu will be displayed
3. On Z88, select B)atch receive
by pressing 'b' and then press the key.
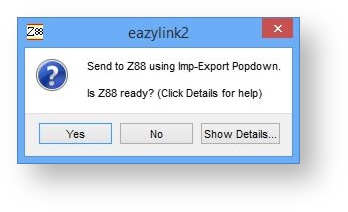
On the Desktop, click 'Yes' to 'Is Z88 ready?'
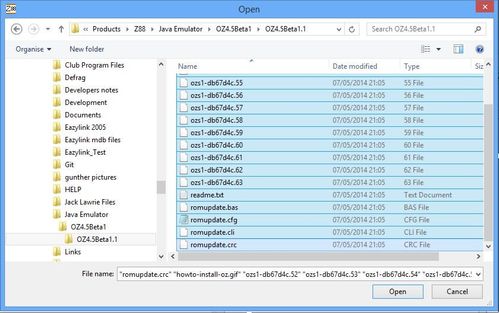
The Desktop will now display a window for you to select which file(s) to send.
Mark the desired files
Note
There are more files sent than needed. This is the standard developers listing. Select all the files needed for slot 1 xxxxx.52 to xxxxx.63 and all the 'romupdate' files.
Warnings will be given for invalid file-names selected. e.g. howto-install-oz.gif
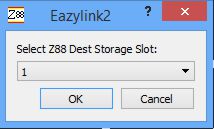
Select the Z88's destination storage slot (in this case Slot 1).
After press OK the Z88 screen will show
Using remote name:  :RAM.1/the_filename
(Incrementing numbers on this row)
End of file
This will repeat itself until all the files are transferred.
Press on the Z88 to return to the Imp-Export Menu.
Receive files from the Z88
This mode is not normally needed. The procedure above to creates an Eazylink or OZ image to blow into a Flash card. The Eazylink application on the Z88 should now be used to receive files.
On the top menu bar, Select Z88
- Select - Receive files from Z88 Imp-Export popdown
You will now be presented with Select Receive Directory. Create and/or Choose which Directory to use.
Note
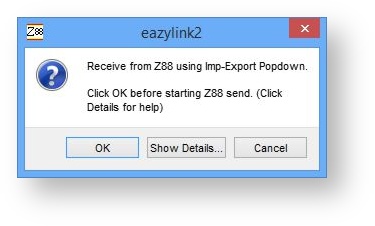
You need to select OK here on the Desktop before starting the Z88. If you get the Imp-Export Receive Command Failed! message, Choose Retry.If 'Show Details...' is selected, you will be presented with a help screen listing instructions (without the screen shots) on how to use the Z88.
1. Start Z88
Select Panel
Use S
Change the Default device to :RAM.1 or where your files are.
As this operation may take some time change the Timeout (mins) to 0.
Remember to PRESS ENTER TO UPDATE otherwise these settings will not change.
Note that the Transmit and Receive rates Parity (9600) and Xon/Xoff settings (no) are the correct value as given. Scroll down to the next instruction.
2. Select Imp-Export
Use X
NOTE: Before doing the following command you should have started the Desktop command.
Scroll down to the next instruction.
3. On Z88, select (S)end
by pressing s and then the key.
You now have two choices
- Use a wildcard (See 'Using wildcard' section for more details), or
- Fetch the files individually, (making sure the spelling is correct), following the instructions 4) and 5) given in 'Show Details' or Help.
If you get a communication error, make a note of the messages on the Z88 screen and try again.
If you get continuous communication errors or nothing happens, go to Solving Communication Errors.

